Inventory management tools
Maintenance Connection provides inventory tools for transferring parts between stock rooms, adjusting part details, and counting inventory.
 Transfer inventory from one stock room to another
To transfer parts from one stock room or bin to another:
-
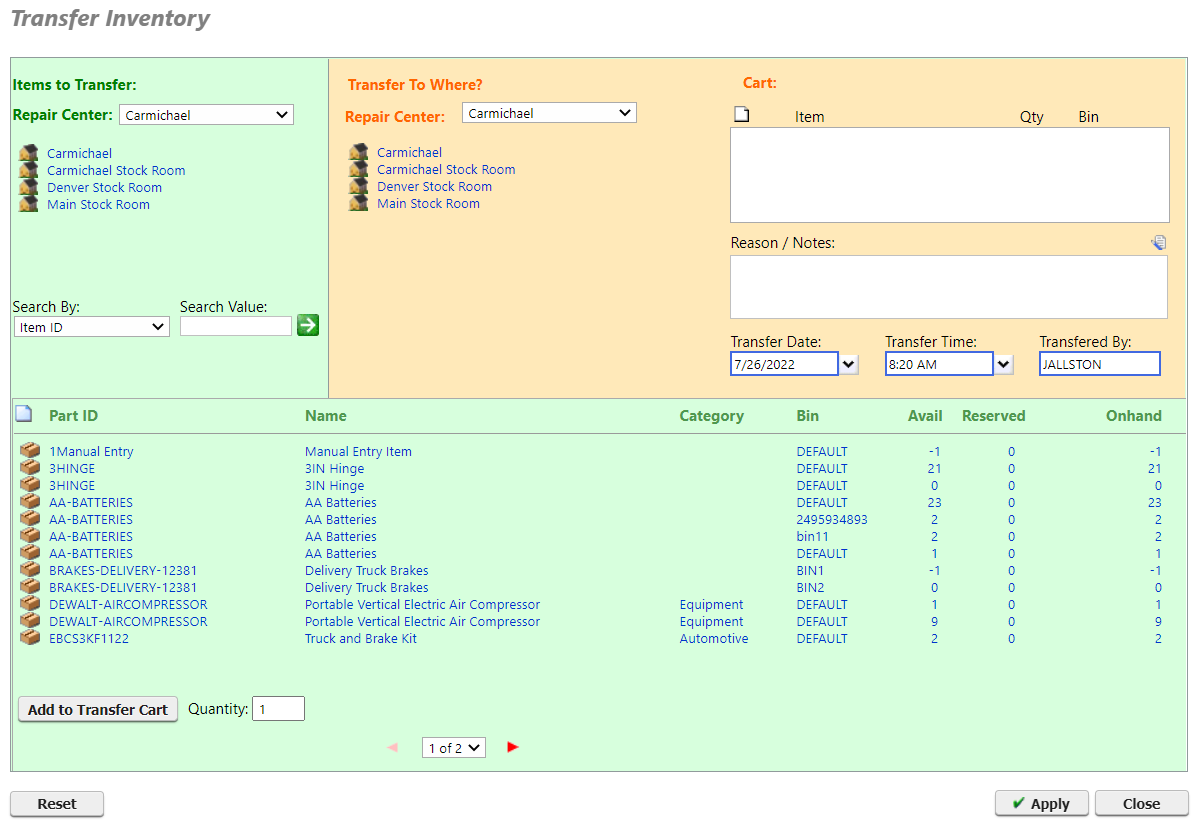
Open the Actions menu and select Transfer Inventory.
The Transfer Inventory tool opens.
-
In the Items to transfer pane select a repair center and stock room where the parts you want to transfer are stored.
The list of parts in the selected stock room populate along the bottom of the tool.
-
In the Transfer to where pane select the stock room you want to transfer the parts to.
-
Select the part you want to transfer in the bottom pane.
-
Enter the Quantity of the part to transfer.
-
Select a Bin in the destination stock room to transfer the parts to.
The bin is set to Default if you don't have a particular bin you want to transfer to.
-
Click Add to Transfer Cart.
The part you selected, along with quantity to transfer and the bin destination, appear in the Transfer to where pane.
-
Optionally, update details about the transfer regarding transfer date, time, and who made the transfer.
-
Repeat steps 2-8 to add as many parts as you want to the Transfer Cart.
-
Click Apply.
A notification appears stating the parts transferred successfully to their stock rooms and bins.
Adjust details for parts in bulk
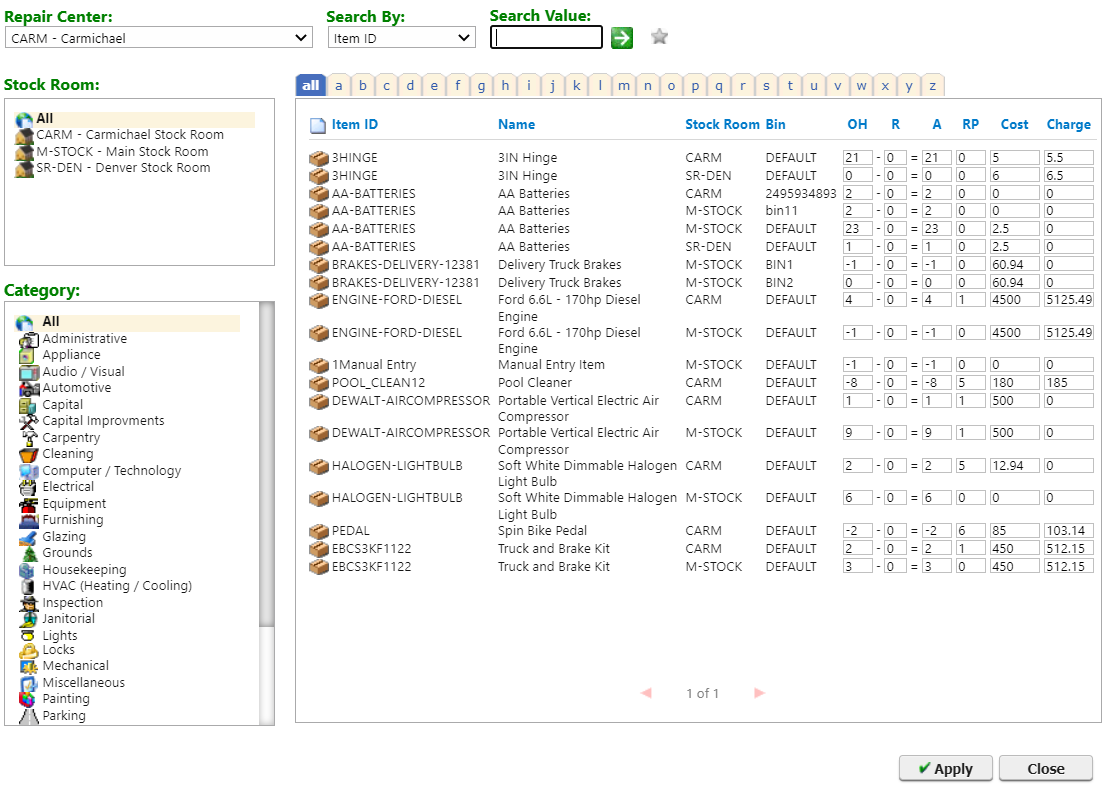
The Adjust Inventory tool lets you make changes to the following details for multiple parts in bulk:
- On Hand quantity
- Reserved quantity
- Available quantity
- Reorder Point
- Cost
- Charge
To adjust details for parts in bulk:
-
Open the Actions menu and select Adjust Inventory.
The Adjust Inventory tool opens.
-
Use filter and search options to narrow the list of parts shown.
-
Manually update the details for the parts shown.
-
Click Apply to save your changes.
-
Close the tool when you're done.
Track and apply manual inventory counts
The Count Inventory tool provides a way to record manual counts of inventory and ensure On Hand quantities in the system match the manual count. The separate Apply Counts to Inventory tool allows administrators or supervisors to approve the count recorded in the Count Inventory tool and apply to stock rooms in the system.
Counting inventory manually
To count inventory using this tool:
-
Open the Actions menu and select Count Inventory.
The Count Inventory tool opens.
-
Use filter and search options to narrow the list of parts shown.
-
Enter the number of parts counted in the Count column.
The Difference is calculated between the current On Hand quantity recorded in the system and the manual Count.
-
Click Apply to save your manual count progress.
-
Close the tool when you're done.
An administrator or supervisor can now use the Apply Counts to Inventory tool to approve and apply the manual count to the system.
Applying inventory counts
Once you have finished counting your inventory using the Count Inventory tool, you still need to actually apply the counts to the part records themselves. These two processes are separated in Maintenance Connection to give administrators more control of actual changes made to part records. This design lets you save progress in the midst of the counting process without altering the records themselves, and then it allows administrators to review the final count results before applying those counts to the system.
To apply manual inventory counts:
-
Open the Count Inventory to review the manual count.
-
When finished, Close the Count Inventory tool and open the Actions menu and select Apply Counts to Inventory....
-
The Apply Counts to Inventory... tool opens.

-
Select the stock rooms on the left you want to apply counts to and click the right arrow button to move them to the right pane.
-
Click Apply.
A notification appears when counts are successfully applied.