How to order and receive parts
The Purchase Orders module is a sophisticated tool used for ordering and receiving Parts in Maintenance Connection. While there are many functions and features that can be utilized in the ordering and receiving process, this article focuses on the basic framework for creating and receiving Purchase Orders so that you can begin using this great tool right away!
 Using the Order Parts feature
The most common method for ordering inventory items is to use the Order Parts feature, which supports building PO line items either automatically or manually.
Building PO line items automatically
-
Select Order Partsfrom the Actions menu.
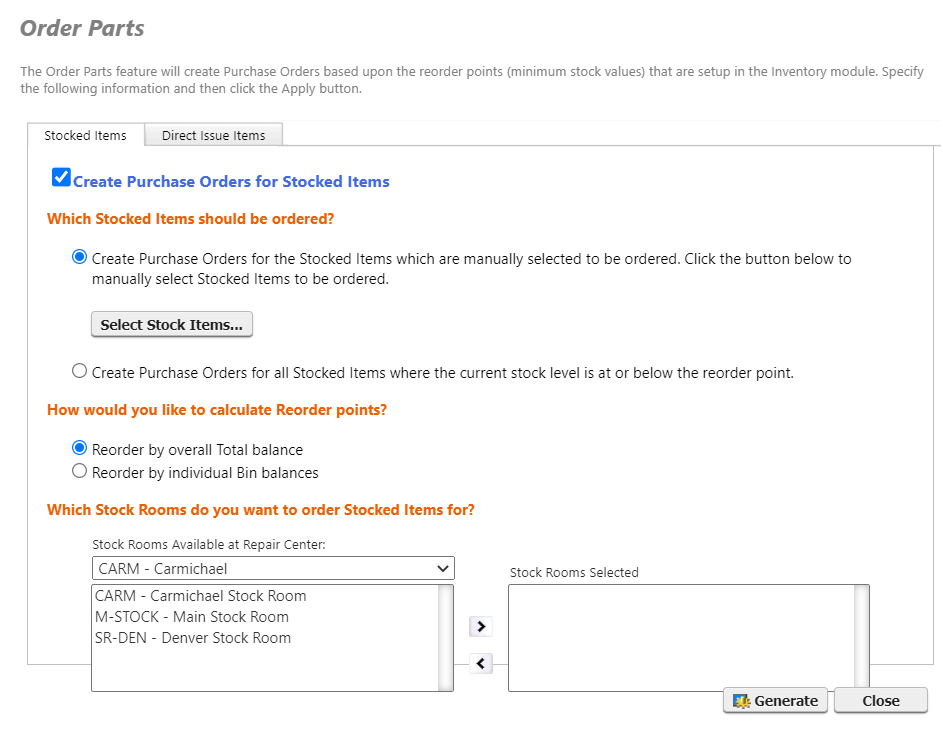
The Order Parts dialog opens, with Stocked Items opened by default.
-
Select Create purchase orders for stocked items.
The remaining items on the tab become selectable.
-
Select Create purchase orders for all stocked items where the current stock level is at or below the reorder point.
-
Specify How would you like to calculate reorder points? Your options are:
-
Reorder by overall total balance - orders parts which have reached the reorder point for the stock room as a whole
-
Reorder by individual bin balances - orders parts which have reached the reorder point for individual bins
-
-
Indicate which repair centers the purchase order should apply to by selecting them on the left and click the right arrow.
-
Click Generate.
A message indicates when the purchase order has been created.
Building PO line items manually
-
Select Order Partsfrom the Actions menu.
The Order Parts dialog opens, with Stocked Items opened by default.
-
Select Create purchase orders for stocked items.
The remaining items on the tab become selectable.
-
Select Create purchase orders for the stocked items which are manually selected to be ordered.
-
Click Select Stock Items.
The Inventory lookup opens.
-
Select the part you want to order.
A dialog opens where you can specify and/or edit default purchasing information for the part, such as vendor and units.
-
Click Apply to add the part to the purchase order and then add more of the same part with different purchasing information.
Click Apply/Close to add the part and return the Inventory lookup.
-
Click Close in the Inventory lookup and return to the Order Parts dialog.
-
Indicate which repair centers the purchase order should apply to by selecting them on the left and click the right arrow.
-
Click Generate.
A message indicates when the purchase order has been created.
Ordering through the Purchase Orders module
While the more common method for ordering Parts is the Order Parts feature described above, you can also create Purchase Orders manually within the Purchase Order module itself. To do this:
- Access the Purchase Orders module, and select the New button in the upper left hand corner of the screen.
- The New Purchase Order record will display in the WorkCenter on the right side of the screen, where you begin the creation process by defining the proper Vendor for the Purchase Order. To do this, click the dropdown arrow for the Vendor field, and select the desired Vendor from the Company lookup.
-
Once a Vendor is set up, select the Line Items tab.
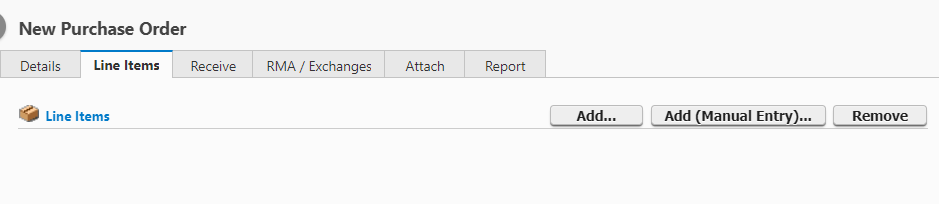
- To add a Part already stored in the system (either a Stocked Item or Direct Issue), click the Add... button.
- The Inventory lookup will appear, from which you can select the desired Part to order. For this example, we'll select the Directly Issued, Fire Extinguisher Part.
- In the dialog that appears, we can define details about the order of the Part, including the Vendor Part # (i.e., the Vendor's Item ID for the Part), the Quantity to order, and the Price per unit. Once the proper details are defined, click the Apply/Close button.
- This will return you to the Line Items tab of the Purchase Order, where the Part we just added will appear.
- To add a Part that is not in the system, we can use the Manual Entry option to add it to the Purchase Order. This is typically used for one-time purchases of Parts. To use this option, click the Add (Manual Entry)... option.
- In the dialog that appears, input all the desired information regarding the Item Name, Price, Quantity, etc. Notice that the Item ID can not be modified from Manual Entry. Click the Apply button when finished.
- The Manual Entry Part will display on the Line Items tab. To complete the Purchase Order creation process, click the Save button.
Note: If you use the Manual Entry option multiple times, it is likely that the Vendor set up for the Item ID ( Manual Entry for every manually entered record) will change. This may in turn cause display problems down the road whenever a Manual Entry Part is added to a Work Order. To resolve this issue, please take a look at the Inventory Tips and Troubleshooting Using SQL article, under the Sync to Remove Vendor From Manual Entry Part heading.
How to receive parts
Now that we know how and when to create Purchase Orders, let's take a look at what to do when the Parts that we've ordered actually arrive. The Receive tab in the Purchase Orders module is the place to start. To access the Receive tab associated with the items we have received, we have to be sure we have navigated to the proper Purchase Order that has now been fulfilled. There are two ways to do this:
- Select the Receive Parts option from the Actions menu. This will navigate you to the Search tab within the Purchase Order List pane. From here you can search for the Purchase Order for which to add a receipt.
- Alternatively, you can select the proper Purchase Order directly from the List tab of the Purchase Orders List pane. Once you have selected the desired Purchase Order, click the Receive tab in the WorkCenter.
- The Receipts sub-tab will display by default. From this tab, select the Add... button.
- The New Receipt dialog will appear, displaying all the Line Items for the Purchase Order. To receive one of the Line Items, simply select its corresponding Receive All button. This will mark the entire ordered quantity for the Line Items as received. If only a portion of the ordered quantity has been received, enter the number of received Parts in the Quantity to Receive field:
- If you have received the full quantity of every Line Item, you can mark the entire Purchase Order as received by clicking the Receive All button at the bottom of the dialog.
- Line Items that have been received will display in yellow. To confirm receipt, click the Apply button.
- The Parts received will display in the Receive>Receipts sub-tab, along with other receipt details:
This article offers a basic framework for ordering and receiving Parts in Maintenance Connection. To dig deeper into these Inventory and Purchase Order features, please check out the rest of the articles in this section of the Knowledge Base.
Because of all the details that can be defined and managed in the ordering and receiving process, you may find it helpful to further your training in these features. Please consider subscribing to our premium, on-demand training provided through Accruent Academy. You can also reach out to our Customer Success Team to request one-on-one training in how to use the Inventory and Purchase Order modules to their fullest potential.